Phaser 2 had buttons but they aren’t built in to Phaser 3. In reality, they are simple to make on our own. In this tutorial we’ll break down what it means for something to be a button and how to make one in Phaser-land.
Buttons Aren’t Scary
Buttons aren’t some magic black box of mystery. A button in its simplest form is something that responds to clicks.
That’s it.
Hover states, animations, fancy effects, whatever, are just icing on the cake. Phaser makes it really easy to make something clickable, so let’s start with building that.
Project Setup
I’ll be using the project setup from this blog post. You can follow through that post to set up the project yourself, or you can clone the full setup from GitHub and follow the instructions in its README.
Once you have the project running you should see something like this in your browser:
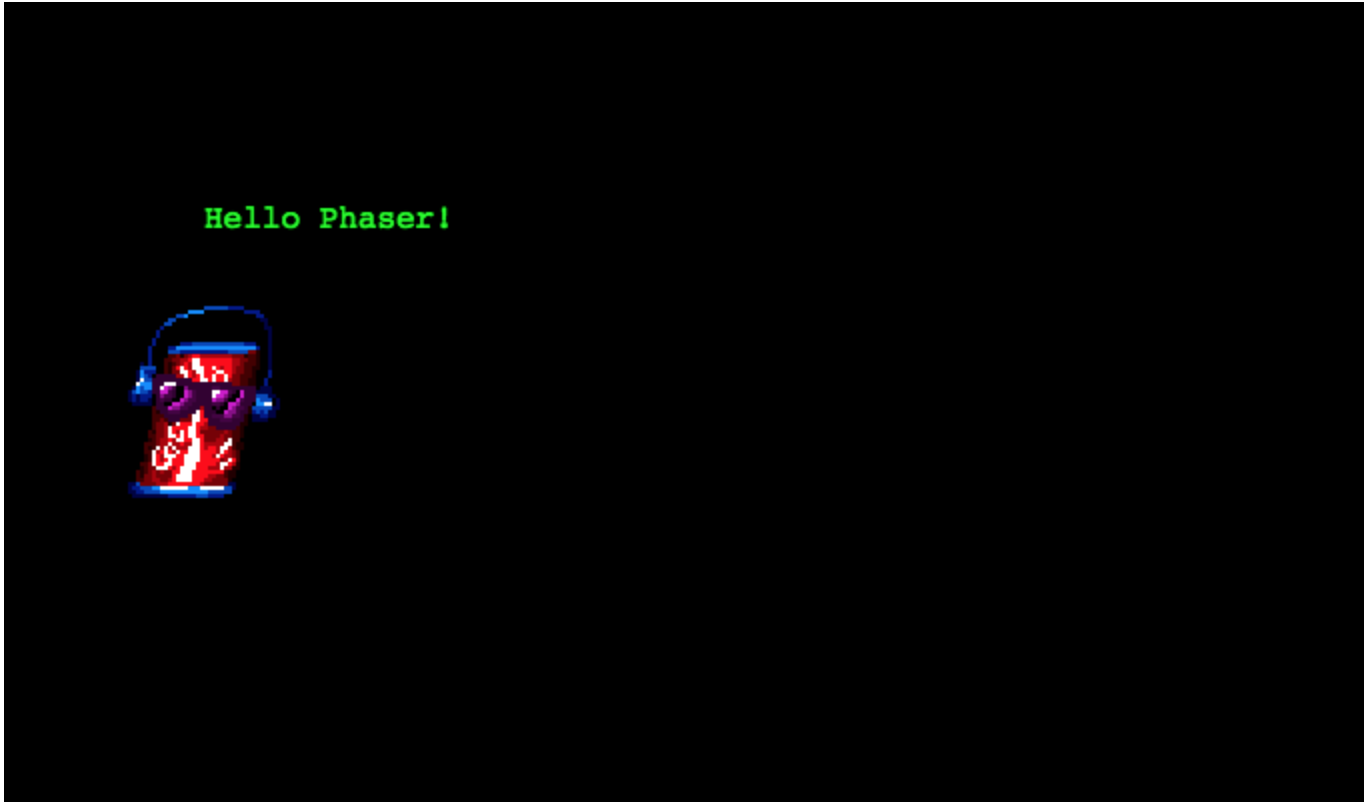
The Most Basic Button
Lucky for us our project already has taken care of the first part of our most basic button. That ugly green text on that ugly black background? Looks like a perfect candidate for an ugly button!.
Every object that gets added to our scene is an instance that extends from Phaser.GameObjects.GameObject. In this case, Phaser.GameObjects.Text extends the base GameObject class. It’s this class that provides us with the method we need to make our text (or image, or sprite, or any other GameObject) clickable.
We need tell Phaser that we want our player to be able to interact with our GameObject. I wonder what method we should call on GameObject.
Great guess! It is the setInteractive method. Don’t worry about any of the arguments to the method for now. If we call that method on our text object with no parameters, it will make the rectangular bounds of our text interactive, which is exactly what we want.
So let’s do that in scenes/simple-scene.js. We’ll also keep a reference to our text object in a variable so we have access to it later. Since we don’t need the coke can sprite, we can remove that as well.
export class SimpleScene extends Phaser.Scene {
  create() {
    const helloButton = this.add.text(100, 100, 'Hello Phaser!', { fill: '#0f0' });
    helloButton.setInteractive();
  }
}
Great! But it doesn’t seem like anything has changed in our browser. We can check that our text is interactive by adding event listeners to it. When we tell Phaser a GameObject is interactive it will start to emit events whenever any player interaction occurs with that GameObject. These events are emitted in two ways:
- Directly from the
GameObjectitself - From the
InputPluginobject (this.inputin a scene)
Since we only care about interaction events on our GameObject and not for the scene in general, we’ll only listen to events coming directly from our text and ignore those coming from the InputPlugin.
All GameObjects extend from EventEmitter3, so we can listen for the input events directly on the GameObject with the on method. Let’s verify our text is actually emitting the input events by listening for the pointerover event, which is fired when the cursor first overlaps with the game object.
export class SimpleScene extends Phaser.Scene {
  create() {
    const helloButton = this.add.text(100, 100, 'Hello Phaser!', { fill: '#0f0' });
    helloButton.setInteractive();

    helloButton.on('pointerover', () => { console.log('pointerover'); });
  }
}

Great, we know our “button” is firing off input events that we can listen for and respond to. The other events that we care about are:
pointerout- this is the opposite ofpointerover. It fires when the cursor leaves the area of the game object.pointerdown- this fires at the start of a click or a touch on the game object, literally when the mouse button is pushed down or when a finger touches down.pointerup- this is the opposite ofpointerdown. It fires when the mouse button is released or a finger is lifted up from the game object.
The Most Basic Button™ only cares about when the user clicks on it, so to start we’ll only need to listen to the pointerdown event. Let’s set up our scene to have have a click counter that increases everytime we click on our button. We’ll change our helloButton to a clickButton and add another text object to display the click counter’s value.
We’ll also chain our method calls to the clickButton object to make it slightly easier to read.
export class SimpleScene extends Phaser.Scene {
  create() {
    let clickCount = 0;
    this.clickCountText = this.add.text(100, 200, '');

    const clickButton = this.add.text(100, 100, 'Click me!', { fill: '#0f0' })
      .setInteractive()
      .on('pointerdown', () => this.updateClickCountText(++clickCount) );

    this.updateClickCountText(clickCount);
  }

  updateClickCountText(clickCount) {
    this.clickCountText.setText(`Button has been clicked ${clickCount} times.`);
  }
}
So there’s our Most Basic Button™.
The Slightly More Complicated Button
Didn’t it feel weird when you moused over The Most Basic Button™ and nothing changed visually? This is because you were expecting the button to have some kind of hover state. We can detect when a user is hovering over a button with the pointerover event, and detect when the user leaves the hover state with the pointerout event. Let’s have our button change its text color when the user hovers over it. We can add listeners for those two events to change our button’s color. We’ll also need to save a reference to our button in the scene so we can call the setStyle method on it from a couple helper methods we’ll write.
export class SimpleScene extends Phaser.Scene {
  create() {
    let clickCount = 0;
    this.clickCountText = this.add.text(100, 200, '');

    this.clickButton = this.add.text(100, 100, 'Click me!', { fill: '#0f0' })
     .setInteractive()
     .on('pointerdown', () => this.updateClickCountText(++clickCount) )
     .on('pointerover', () => this.enterButtonHoverState() )
     .on('pointerout', () => this.enterButtonRestState() );

    this.updateClickCountText(clickCount);
  }

  updateClickCountText(clickCount) {
    this.clickCountText.setText(`Button has been clicked ${clickCount} times.`);
  }

  enterButtonHoverState() {
    this.clickButton.setStyle({ fill: '#ff0'});
  }

  enterButtonRestState() {
    this.clickButton.setStyle({ fill: '#0f0' });
  }
}
Similarly, our Slightly More Complicated Button™ should have an active state too. Which gives our button three different states in total: rest, hover, and active. Let’s explicitly call out how we will transition between all our states:
          pointerover             pointerdown
+------+  ---------->  +-------+  ---------->  +--------+
| rest |               | hover |               | active |
+------+  <----------  +-------+  <----------  +--------+
          pointerout              pointerup
We can tell when our button becomes active by listening to the pointerdown event. We’ll also change our existing listener that updates the counter to run on the pointerup event so we can make our button feel like it’s correctly transitioning through its states.
export class SimpleScene extends Phaser.Scene {
  create() {
    let clickCount = 0;
    this.clickCountText = this.add.text(100, 200, '');

    this.clickButton = this.add.text(100, 100, 'Click me!', { fill: '#0f0' })
      .setInteractive()
      .on('pointerover', () => this.enterButtonHoverState() )
      .on('pointerout', () => this.enterButtonRestState() )
      .on('pointerdown', () => this.enterButtonActiveState() )
      .on('pointerup', () => {
        this.updateClickCountText(++clickCount);
        this.enterButtonHoverState();
    });

    this.updateClickCountText(clickCount);
  }

  updateClickCountText(clickCount) {
    this.clickCountText.setText(`Button has been clicked ${clickCount} times.`);
  }

  enterButtonHoverState() {
    this.clickButton.setStyle({ fill: '#ff0'});
  }

  enterButtonRestState() {
    this.clickButton.setStyle({ fill: '#0f0' });
  }

  enterButtonActiveState() {
    this.clickButton.setStyle({ fill: '#0ff' });
  }
}

The Just A Little More Intuitive Yet Slightly More Complicated Button
As of version 3.10.0, Phaser makes it very easy for us to change the mouse cursor to a hand during the hover state of our button. Instead of calling setInteractive on our GameObject with no parameters, we’ll pass in an object with the useHandCursor property set to true.
export class SimpleScene extends Phaser.Scene {
  create() {
    let clickCount = 0;
    this.clickCountText = this.add.text(100, 200, '');

    this.clickButton = this.add.text(100, 100, 'Click me!', { fill: '#0f0' })
      .setInteractive({ useHandCursor: true })
      .on('pointerover', () => this.enterButtonHoverState() )
      .on('pointerout', () => this.enterButtonRestState() )
      .on('pointerdown', () => this.enterButtonActiveState() )
      .on('pointerup', () => {
        this.updateClickCountText(++clickCount);
        this.enterButtonHoverState();
    });

    this.updateClickCountText(clickCount);
  }

  updateClickCountText(clickCount) {
    this.clickCountText.setText(`Button has been clicked ${clickCount} times.`);
  }

  enterButtonHoverState() {
    this.clickButton.setStyle({ fill: '#ff0'});
  }

  enterButtonRestState() {
    this.clickButton.setStyle({ fill: '#0f0' });
  }

  enterButtonActiveState() {
    this.clickButton.setStyle({ fill: '#0ff' });
  }
}

Keeping It Clean
In the spirit of keeping our codebase well organized, we have some refactoring to do. If we want to add more than one of our ugly buttons to our game, we would need to duplicate this code each time. Instead of that, let’s extract the code for the button into its own class.
Bonus Tip: Phaser has an excellent plugin system that allows you to add your own
GameObjectfactories. But honestly, I haven’t taken the time to dive into it yet, plus its a little outside the scope of this tutorial. As an exercise on your own, try and build this out into a real plugin!
A Custom GameObject
Let’s keep it simple and stick with a text-only button. Make a new folder in your project to keep our custom game object in:
mkdir src/game-objects
Then create a file for our text button:
touch src/game-objects/text-button.js
And then in the file, lets start off with exporting an empty class that extends the Phaser text object.
export class TextButton extends Phaser.GameObjects.Text {

}
Congratulations! You’ve created your first custom GameObject. Granted, it doesn’t have any custom functionality - it’s just a renamed text object at this point. But we may as well start using it in our refactoring process.
We’ll need to slightly adjust how we’re creating our text button as well. Since there is no factory method for our custom game object, we’ll have to instantiate it manually and then add it to the scene. Let’s start by doing that with the regular Phaser text object.
export class SimpleScene extends Phaser.Scene {
  create() {
    let clickCount = 0;
    this.clickCountText = this.add.text(100, 200, '');

    this.clickButton = new Phaser.GameObjects.Text(this, 100, 100, 'Click me!', { fill: '#0f0'});
    this.add.existing(this.clickButton);
    this.clickButton
      .setInteractive({ useHandCursor: true })
      .on('pointerover', () => this.enterButtonHoverState() )
      .on('pointerout', () => this.enterButtonRestState() )
      .on('pointerdown', () => this.enterButtonActiveState() )
      .on('pointerup', () => {
        this.updateClickCountText(++clickCount);
        this.enterButtonHoverState();
    });

    this.updateClickCountText(clickCount);
  }

  updateClickCountText(clickCount) {
    this.clickCountText.setText(`Button has been clicked ${clickCount} times.`);
  }

  enterButtonHoverState() {
    this.clickButton.setStyle({ fill: '#ff0'});
  }

  enterButtonRestState() {
    this.clickButton.setStyle({ fill: '#0f0'});
  }

  enterButtonActiveState() {
    this.clickButton.setStyle({ fill: '#0ff' });
  }
}
We call the Phaser.GameObjects.Text constructor and pass in the Scene instance as the first parameter. Then we call the Scene’s this.add.existing method and pass in our instantiated Text object. This is almost exactly what the this.add.text method does internally.
Now, we can import our TextButton and use that instead.
import { TextButton } from '../game-objects/text-button';

export class SimpleScene extends Phaser.Scene {
  create() {
    let clickCount = 0;
    this.clickCountText = this.add.text(100, 200, '');

    this.clickButton = new TextButton(this, 100, 100, 'Click me!', { fill: '#0f0'});
    this.add.existing(this.clickButton);
    this.clickButton
      .setInteractive({ useHandCursor: true })
      .on('pointerover', () => this.enterButtonHoverState() )
      .on('pointerout', () => this.enterButtonRestState() )
      .on('pointerdown', () => this.enterButtonActiveState() )
      .on('pointerup', () => {
        this.updateClickCountText(++clickCount);
        this.enterButtonHoverState();
    });

    this.updateClickCountText(clickCount);
  }

  updateClickCountText(clickCount) {
    this.clickCountText.setText(`Button has been clicked ${clickCount} times.`);
  }

  enterButtonHoverState() {
    this.clickButton.setStyle({ fill: '#ff0'});
  }

  enterButtonRestState() {
    this.clickButton.setStyle({ fill: '#0f0'});
  }

  enterButtonActiveState() {
    this.clickButton.setStyle({ fill: '#0ff' });
  }
}
Now that we are using an instance of our TextButton, let’s start baking in some of its functionality. We’ll hardcode it to start, then allow the button to be configured through some parameters in its constructor.
Functionality for our TextButton
We can start by having the button automatically set itself as interactive. We want to do this when the button is instantiated, so we’ll have to override the constructor for the button.
It’s important that our overridden constructor calls the Phaser.GameObjects.Text’s constructor prior to our custom functionality. This way, the Text object gets created correctly in Phaser. So we take in the same parameters that we are currently passing to the Text object’s constructor, and just forward them along in ours.
export class TextButton extends Phaser.GameObjects.Text {
  constructor(scene, x, y, text, style) {
    super(scene, x, y, text, style);
  }
}
Now we can add remove the call to the setInteractive method from our Scene and add it in to our TextButton constructor.
export class TextButton extends Phaser.GameObjects.Text {
  constructor(scene, x, y, text, style) {
    super(scene, x, y, text, style);

    this.setInteractive({ useHandCursor: true });
  }
}
import { TextButton } from '../game-objects/text-button';

export class SimpleScene extends Phaser.Scene {
  create() {
    let clickCount = 0;
    this.clickCountText = this.add.text(100, 200, '');

    this.clickButton = new TextButton(this, 100, 100, 'Click me!', { fill: '#0f0'});
    this.add.existing(this.clickButton);
    this.clickButton
      .on('pointerover', () => this.enterButtonHoverState() )
      .on('pointerout', () => this.enterButtonRestState() )
      .on('pointerdown', () => this.enterButtonActiveState() )
      .on('pointerup', () => {
        this.updateClickCountText(++clickCount);
        this.enterButtonHoverState();
    });

    this.updateClickCountText(clickCount);
  }

  updateClickCountText(clickCount) {
    this.clickCountText.setText(`Button has been clicked ${clickCount} times.`);
  }

  enterButtonHoverState() {
    this.clickButton.setStyle({ fill: '#ff0'});
  }

  enterButtonRestState() {
    this.clickButton.setStyle({ fill: '#0f0'});
  }

  enterButtonActiveState() {
    this.clickButton.setStyle({ fill: '#0ff' });
  }
}
And our TextButton still works! This is a good example of how refactoring generally goes. Build something out, then pull out the related parts into their own components.
Let’s pull in our active state next. This means taking our pointerdown event listener out of our Scene and putting it into the TextButton. We’ll also pull the enterButtonActiveState method into our TextButton class as well. Don’t forget that in our TextButton, the this context is the game object itself. So we’ll call this.setStyle in our enterButtonActiveState method instead of how the Scene was calling it before.
export class TextButton extends Phaser.GameObjects.Text {
  constructor(scene, x, y, text, style) {
    super(scene, x, y, text, style);

    this.setInteractive({ useHandCursor: true })
      .on('pointerdown', () => this.enterButtonActiveState() )
  }

  enterButtonActiveState() {
    this.setStyle({ fill: '#0ff' });
  }
}
import { TextButton } from '../game-objects/text-button';

export class SimpleScene extends Phaser.Scene {
  create() {
    let clickCount = 0;
    this.clickCountText = this.add.text(100, 200, '');

    this.clickButton = new TextButton(this, 100, 100, 'Click me!', { fill: '#0f0'});
    this.add.existing(this.clickButton);
    this.clickButton
      .on('pointerover', () => this.enterButtonHoverState() )
      .on('pointerout', () => this.enterButtonRestState() )
      .on('pointerup', () => {
        this.updateClickCountText(++clickCount);
        this.enterButtonHoverState();
    });

    this.updateClickCountText(clickCount);
  }

  updateClickCountText(clickCount) {
    this.clickCountText.setText(`Button has been clicked ${clickCount} times.`);
  }

  enterButtonHoverState() {
    this.clickButton.setStyle({ fill: '#ff0'});
  }

  enterButtonRestState() {
    this.clickButton.setStyle({ fill: '#0f0'});
  }
}
Let’s pull in the rest of the style changes for the button now. We’ll leave the function call to update the clickCountText in our Scene for now.
export class TextButton extends Phaser.GameObjects.Text {
  constructor(scene, x, y, text, style) {
    super(scene, x, y, text, style);

    this.setInteractive({ useHandCursor: true })
      .on('pointerover', () => this.enterButtonHoverState() )
      .on('pointerout', () => this.enterButtonRestState() )
      .on('pointerdown', () => this.enterButtonActiveState() )
      .on('pointerup', () => this.enterButtonHoverState() );
  }

  enterButtonHoverState() {
    this.setStyle({ fill: '#ff0'});
  }

  enterButtonRestState() {
    this.setStyle({ fill: '#0f0'});
  }

  enterButtonActiveState() {
    this.setStyle({ fill: '#0ff' });
  }
}
import { TextButton } from '../game-objects/text-button';

export class SimpleScene extends Phaser.Scene {
  create() {
    let clickCount = 0;
    this.clickCountText = this.add.text(100, 200, '');

    this.clickButton = new TextButton(this, 100, 100, 'Click me!', { fill: '#0f0'});
    this.add.existing(this.clickButton);
    this.clickButton.on('pointerup', () => {
        this.updateClickCountText(++clickCount);
    });

    this.updateClickCountText(clickCount);
  }

  updateClickCountText(clickCount) {
    this.clickCountText.setText(`Button has been clicked ${clickCount} times.`);
  }
}
Awesome! Our code in the Scene is looking much cleaner already - the code in the scene doesn’t have anything to do with changing the styles in our TextButton. That’s a responsibility the TextButton should have for itself.
Passing in a Callback
As developers we don’t want to have to know how the TextButton works internally to use it. We shouldn’t have to know that it considers a pointerup event to be the appropriate time to respond to the user’s click. Having this knowledge abstracted away from our Scene and into the TextButton makes it a more reusable and simpler component. To fix this, we can pass in a callback function as a parameter to the TextButton constructor.
This change also involves slightly reworking our updateClickCountText method so that it knows about the clickCount value.
export class TextButton extends Phaser.GameObjects.Text {
  constructor(scene, x, y, text, style, callback) {
    super(scene, x, y, text, style);

    this.setInteractive({ useHandCursor: true })
      .on('pointerover', () => this.enterButtonHoverState() )
      .on('pointerout', () => this.enterButtonRestState() )
      .on('pointerdown', () => this.enterButtonActiveState() )
      .on('pointerup', () => {
        this.enterButtonHoverState();
        callback();
      });
  }

  enterButtonHoverState() {
    this.setStyle({ fill: '#ff0'});
  }

  enterButtonRestState() {
    this.setStyle({ fill: '#0f0'});
  }

  enterButtonActiveState() {
    this.setStyle({ fill: '#0ff' });
  }
}
import { TextButton } from '../game-objects/text-button';

export class SimpleScene extends Phaser.Scene {
  create() {
    this.clickCount = 0;
    this.clickCountText = this.add.text(100, 200, '');

    this.clickButton = new TextButton(this, 100, 100, 'Click me!', { fill: '#0f0'}, () => this.updateClickCountText());
    this.add.existing(this.clickButton);

    this.updateClickCountText();
  }

  updateClickCountText() {
    this.clickCountText.setText(`Button has been clicked ${this.clickCount} times.`);
    this.clickCount++;
  }
}
Great! Everything that makes our TextButton a TextButton now lives inside the TextButton class. It knows how to change transition between its interaction state, as well as when to call the callback function that’s passed in through its constructor. What that callback does is not a concern to the TextButton, but rather to our Scene.
Adding Another TextButton
So let’s put all this abstraction to good use. Let’s add another button to our scene that will subtract one from our click count. We’ll rework some of the code in our Scene here as well:
import { TextButton } from '../game-objects/text-button';

export class SimpleScene extends Phaser.Scene {
  create() {
    this.clickCount = 0;
    this.clickCountText = this.add.text(100, 200, '');

    this.incrementButton = new TextButton(this, 100, 100, 'Increment Count', { fill: '#0f0'}, () => this.incrementClickCount());
    this.add.existing(this.incrementButton);

    this.decrementButton = new TextButton(this, 100, 150, 'Decrement Count', { fill: '#0f0'}, () => this.decrementClickCount());
    this.add.existing(this.decrementButton);

    this.updateClickCountText();
  }

  incrementClickCount() {
    this.clickCount += 1;
    this.updateClickCountText();
  }

  decrementClickCount() {
    this.clickCount -= 1;
    this.updateClickCountText();
  }

  updateClickCountText() {
    this.clickCountText.setText(`Button has been clicked ${this.clickCount} times.`);
  }
}
We didn’t have to touch our TextButton class at all! Since our TextButton only concerns itself with being a button, and our Scene only concerns itself with the actual scene logic, we were able to reuse our custom game object really easily.
Wrapping It Up
You can find the full source of this example up on github. Phaser also has a great set of examples for interacting with the input systems. Take a look at these three examples for the same pointer events we used for our button: pointerup, pointerdown, pointerover and pointerout.
Hopefully it was helpful to see that buttons really aren’t anything special in Phaser: they are just GameObjects that respond to pointer events. That means that rather than a Text object, you could also make a button out of a Sprite, or an Image, or any other game object!
I hope that the exercise in refactoring was helpful too. This is a good pattern to follow for building out different components of your game. Build it and make it work in your scene, refactor it out so that its logic is encapsulated to its own file. Clean coders will tell you this is keeping a good Separation of Concerns in your project.
Bonus Exercises:
- Remember how I mentioned that Phaser 3 has a great plugin system? Here’s an example of how to register a custom game object with Phaser: https://labs.phaser.io/view.html?src=src/plugins/custom%20game%20object.js. Transform our
TextButtoninto an plugin. - The concept of a button isn’t special to Phaser! Try doing the same thing with a
<div>html element and listening formouseover,mouseout,mousedown,mouseupevents and changing something about the<div>for each of them. - What if you want your
TextButtonto have different colors for each of its states? Enhance theTextButtonto allow the user to change the styles for each state. Hint: pass in more parameters via the constructor, or add some setter methods! - Add a new “clicked” state to the button (much like the
visitedstate of a link on a website). - Make an
ImageButtonthat shows a different image for each of the button’s states.